How to install geogrid
How to Install Geogrid: A Comprehensive Guide
Geogrid installation is an essential process in construction and engineering projects, especially in road construction, slope stabilization, and retaining wall projects. Geogrids play a crucial role in soil reinforcement, improving the stability and load-bearing capacity of structures. Whether you're working on an infrastructure project or looking to reinforce your garden’s retaining walls, understanding how to install geogrid properly is key to ensuring its effectiveness. In this article, we will guide you through the step-by-step process of installing geogrid, highlighting important factors and tips to achieve optimal performance.
What is Geogrid?
Geogrid is a synthetic material commonly made from polyester, polypropylene, or polyethylene, and it is used for soil stabilization and reinforcement. The primary function of geogrids is to provide tensile strength, helping to reduce soil movement and increase load-bearing capacity. Geogrids come in various forms, such as biaxial, uniaxial, and triaxial, each suited for specific applications. The correct installation of geogrid ensures the desired outcome of soil reinforcement, preventing the degradation of the material over time.
Why is Proper Geogrid Installation Important?
Proper geogrid installation is critical because it directly affects the performance and longevity of the project. Incorrect installation can lead to soil instability, reduced load-bearing capacity, and even the failure of retaining structures. By following the correct procedures, you ensure the geogrid functions as intended, providing lasting reinforcement and improving the safety and durability of your infrastructure.
Step-by-Step Guide on How to Install Geogrid
1. Site Preparation
The first step in geogrid installation is preparing the site. This involves clearing the area of any debris, vegetation, or loose soil that could interfere with the installation process. The ground must be level and stable to ensure that the geogrid functions optimally. The soil should be compacted to a suitable density to provide a stable foundation for the geogrid.
During site preparation, you should also verify that the dimensions of the installation area match the required specifications. Properly measuring the area ensures that the geogrid fits well and performs as expected.
2. Excavation and Subgrade Preparation
Once the site is cleared, the next step is to excavate the area according to the design requirements. This step may involve digging to a specific depth, depending on the project’s needs. The subgrade, which is the layer of soil beneath the geogrid, should be compacted to achieve a stable and even surface.
Before proceeding with geogrid installation, it’s crucial to check the moisture content of the soil. Excess moisture can affect the performance of the geogrid, so the soil must be at an appropriate moisture level to prevent issues such as instability or soil slippage.
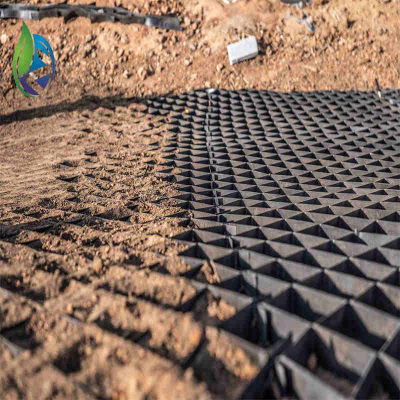
3. Roll Out the Geogrid
Now that the subgrade is prepared, the next step is to unroll the geogrid material across the surface. Start from one end of the excavated area and work your way across. Ensure the geogrid is laid out evenly and without wrinkles, as these can compromise the effectiveness of the material.
For optimal performance, make sure the geogrid is aligned correctly in accordance with the design specifications. It should be placed in the direction that corresponds to the expected load direction (typically the direction of the road or retaining wall). Pay attention to the orientation, as the strength of the geogrid can vary depending on how it is installed.
4. Overlapping Geogrid Layers
In many cases, you will need to overlap geogrid layers to ensure continuous reinforcement across the entire surface. The overlap should generally be around 6 to 12 inches, depending on the manufacturer’s guidelines and project requirements. Overlapping ensures that there are no gaps in the reinforcement, allowing for a more even distribution of the load.
Make sure the geogrid layers are positioned correctly, without misalignment, as this can reduce the material’s effectiveness in reinforcing the soil. Also, check that the edges of the geogrid are secured properly, so they do not shift during the installation process.
5. Backfilling the Geogrid
Once the geogrid is laid and aligned, it’s time to begin backfilling the area. Use the appropriate soil or aggregate material for backfilling, ensuring that it is placed in layers. Each layer of backfill should be compacted to the required density before adding the next layer. This compaction process is essential for achieving maximum soil stability and ensuring the geogrid functions as designed.
The backfill material should be carefully selected based on the soil’s properties and the type of project you are working on. For instance, granular materials like sand or gravel are ideal for many applications as they allow for proper drainage while reinforcing the soil.
6. Compacting the Backfill
After each layer of backfill is placed, it should be thoroughly compacted to ensure a stable base. This is one of the most critical steps in geogrid installation. Proper compaction ensures that the soil bonds to the geogrid, improving the material’s effectiveness in preventing soil movement and increasing load-bearing capacity.
Using the correct compaction equipment is essential for this step. In most cases, a mechanical compactor or roller is used to compress the backfill material to the required density. Ensure that the compaction is uniform across the entire surface to prevent weak spots that could compromise the structure.
7. Final Inspection
Once the backfilling and compaction are complete, conduct a final inspection to ensure that the geogrid has been installed correctly. Check for any loose areas or misalignment in the geogrid layers. If any issues are found, address them immediately to avoid potential problems down the line.
The final inspection should also include checking the stability of the backfill material and ensuring that the surface is level and even. Once everything is in place and properly compacted, the installation is complete.
Conclusion
Knowing how to install geogrid correctly is crucial to ensuring the success of your construction or reinforcement project. From site preparation to backfilling and compaction, each step must be performed with care and precision to achieve the best results. Proper geogrid installation ensures long-term stability, preventing soil erosion and improving the load-bearing capacity of structures like roads, retaining walls, and slopes.
By following the steps outlined in this guide and paying attention to key details like material overlap and compaction, you can ensure that the geogrid performs as intended, providing lasting reinforcement and protection for your construction project.